Monday, August 30, 2010

The Butterfly Effect


In memory of the 1.5 million Jewish children who died during the Holocaust, the Holocaust Museum in Houston Texas is collecting 1.5 million handmade butterflies for a special exhibit in 2012.

Can you imagine how beautiful that will be ?

Trudi at Two Dresses Studio, felt she wanted to spread the word about this project out into the art community of bloggers, and far beyond that too, and has organized an artist project to collect butterflies from as many of "us" as possible.

I knew right away I was in, I think this is a most beautiful way of spreading love throughout the universe, spreading love and making the hatred in the world less powerful.

If you are interested please click on the link in my side bar to find out more information from Trudi, and if you prefer to create and send a butterfly on your own here is a link to the information about the Butterfly Project in Houston.

I am thinking needle felted, or fabric from my vintage linen stash.

Monday, August 23, 2010

Color and Texture play

I was putting together a pile of things from my stash as inspiration for Suzi Blu's new workshop, which is all about Mermaids, and I came up with this little needle felted collage which is still a work in progress. It is done on a painted baby wipe, much like the ones I used for my beads.

Ahhhhh there. You can see some of my baby wipe beads.
I had a lot of fun putting all these bits and pieces together that I have kept them in a bowl now in my studio for inspiration.

I put some batting in the back of the painted baby wipe and needle felted what remind me of little bird nests. I also needle felted some fibers , and I just had to use a couple of these teeny tiny dragonfly beads. I don't have a free hand foot for my sewing machine so I just did some random stitching and now I feel it needs some more hand stitching.

Not sure what I am going to do with it, but it's been fun :) I never did start the Mermaid workshop, I got carried away, lost in a space of my own. I can still catch up later, we are working on color theory and background textures the first few weeks, should be fun.

I hope you find some inspiration in my mess :) Why not make a pile of your own?

Have a colorful day :)
Lynn

Sunday, August 15, 2010

Pressed Wildflower Bookmark Tutorial


I have had lot's of questions about this technique I use for my bookmarks, and also asked if I have a tutorial, well now I do.
I decided to put it all in one post for you and keep a link under "tutorials" on my side bar.

First let me say, this is a tutorial on " how I make my bookmarks", I do not claim in any way at all the wax paper and tissue technique as my own. As I have said in a previous post I found this technique in an article by Susan Hannen in the Spring 2008 issue of Somerset Life magazine. It really is a beautiful issue, I look at it over and over and never get tired of it.

Susan had found this technique in a 1950's Boy Scout handbook and then went on to fiddle with the recipe until she got it right. I have done the same thing, you may need to fiddle, or experiment with amounts of glue and water used to achieve the look you prefer.

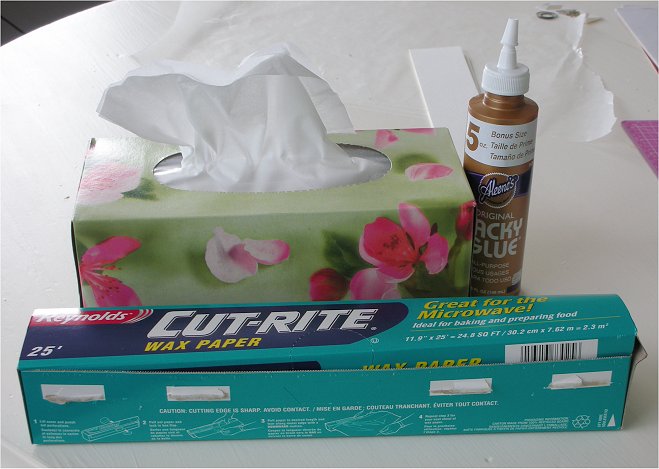
Here are the products I use, 3 ply tissue, Aleene's tacky glue, and Reynolds wax paper which I purchase at the $1 , I hope you can find it at your dollar store too, I use wax paper all the time for working on when I am making a mess, and as a paint pallet, it's great stuff :)

The glue I have used just happened to be the brand I had at home when I first tried this, I am sure you can use any regular glue, but you will have to play with it and see how your brand works for you.

In the second stage of the bookmark I use these products, or gloss gel medium, depends what I feel like. Bits of fiber, and the ink for edging.

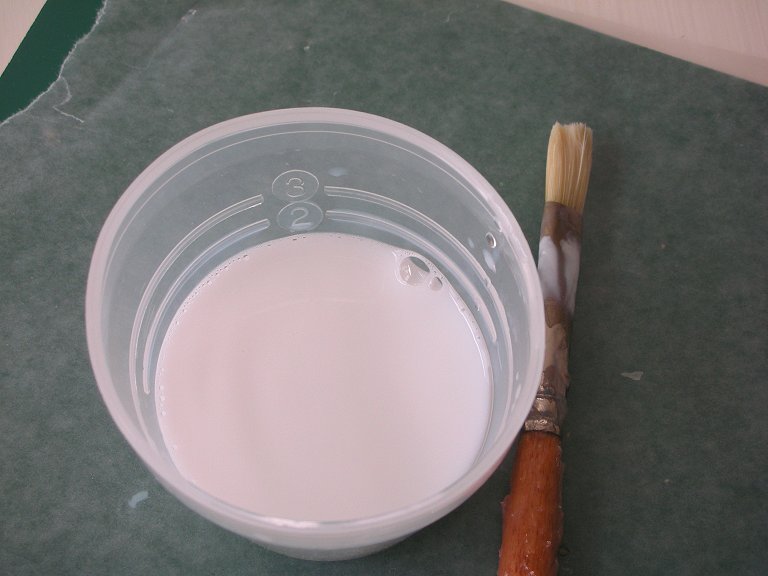
So let's get started. Combine a mixture of approx' 60% glue to 40% water. To be honest I just guess. You don't want it too watery and you don't want it too gluey either.
Mix it really well with an old brush. This is the one I use below just some old thing but the bristles are still soft.

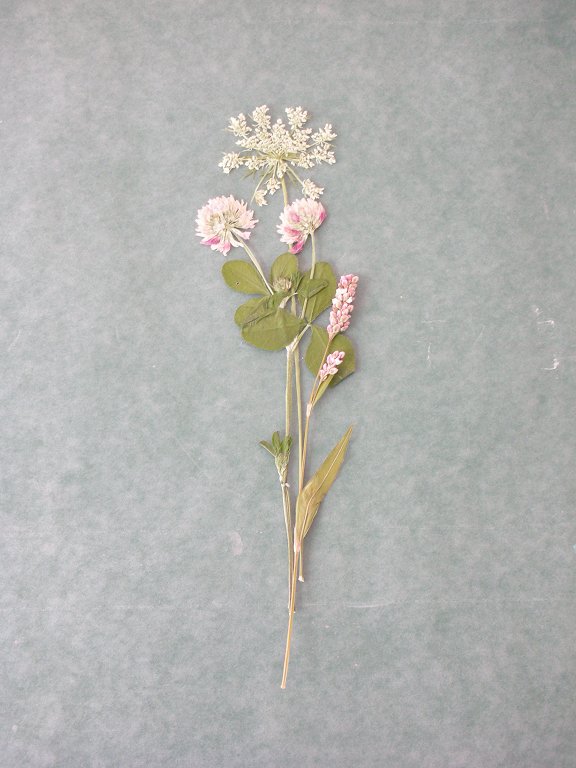
For my bookmarks I use a piece of wax paper from the roll wide enough to make several at a time. Then position my pressed/dried flowers the way I want them.
You can add some fiber at this point too so it is under the glue mixture, or add it later with gel medium. I do it both ways.
I use the shinier or top side of the wax paper to lay my arrangement.
(Val has asked if freezer paper would work, but to be honest I have no idea. I have a feeling there would not be the waxiness in it, but let me know if you try it please :)

Grab a tissue from the box and separate it into 3 ply's, you are only going to use 1 ply. This part I find important because I tried using a 2 ply and I really didn't like the look, it wasn't as transparent.

Make sure you are not in a breezy room to do this, or have a fan blowing :)

Take your tissue and gently place over your arrangement. I hold a section of it lightly with a finger tip as I apply the solution to the tissue.
Dab it gently and not too much, don't over do it or the tissue with split open on you. I first do the section where the flowers are and they don't seem to move once that is done.
Then I work around the arrangement as shown below. I need enough to use as a bookmark so I cover a good area and then I will trim it later. I usually do a row of these so I can use up all the glue/water mixture.

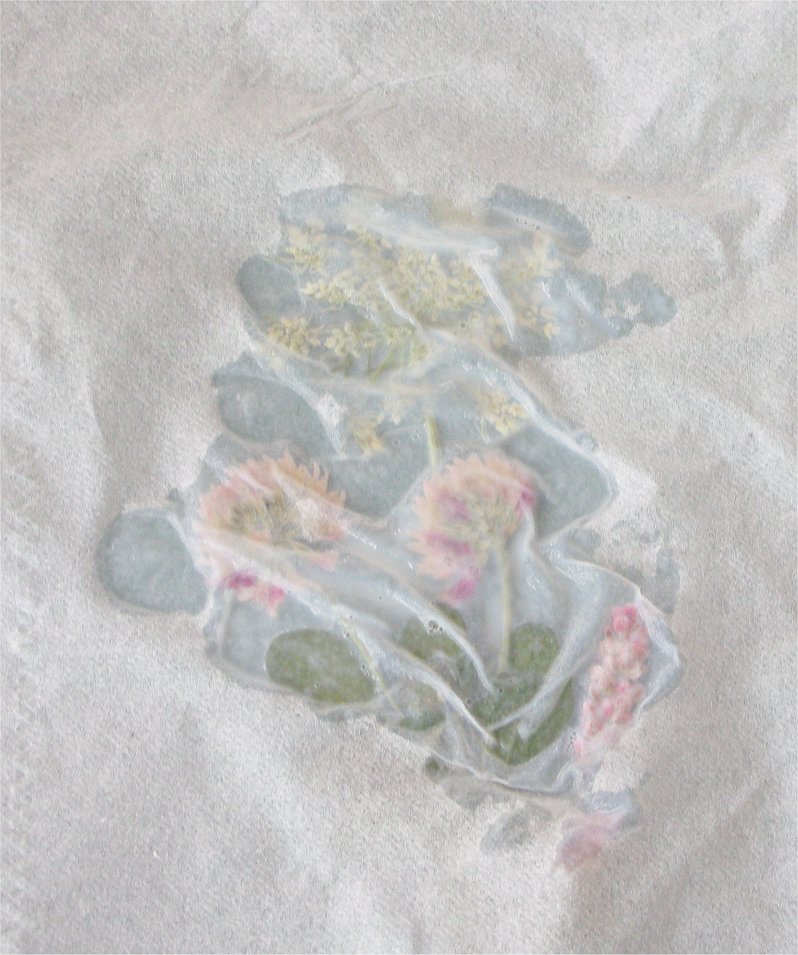
Now you have to be patient and let it dry all day or overnight. Then it will look like this ....

Next step: If you are making a bookmark, cut out two pieces of white "watercolor paper" in the size you would like your bookmark. I am using 140lb cold press which is a heavy weight paper, and sturdy enough for bookmarks.

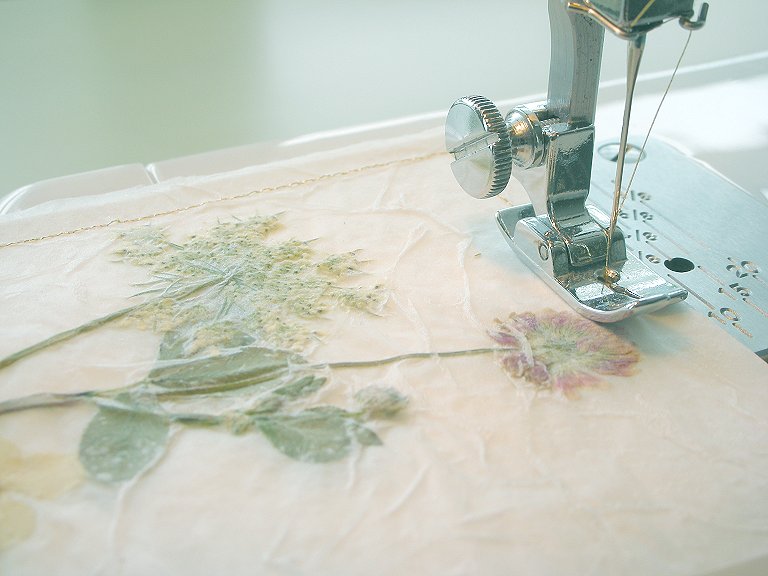
Using a metallic gold thread I now take it to the sewing machine and with one piece of the white watercolor paper I stitch the wax flower paper to it, around the edges.

Tidy up your threads and bring it back to your glue table :)

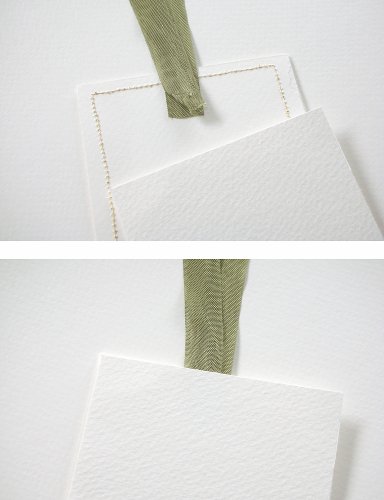
Turn over the piece you have stitched on and place some ribbon as shown below. Glue this to the paper and then glue your second piece of watercolor paper over top of this.

(Another option is to punch a hole in the bookmark when it is finished, then add ribbon. I do it both ways.)

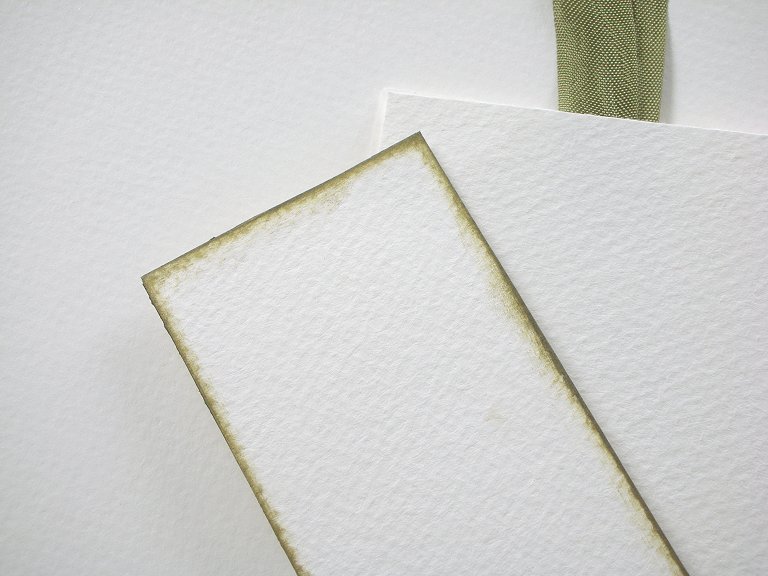
Now I edge the back with the green ink and sign it if I remember. When that has dried which isn't long, turn it over the front again.

Now you can edge the front with the green ink too.
Don't forget these are just my steps, you can do whatever your little heart desires, use any ink, any thread etc etc, just do your thing :)

If you didn't add any fibers under the tissue, you can still do it now. Take a very teeny tiny amount and lay it where you like the look of it. I stick my little finger in the gel medium and rub it right on top of the bookmark. Make sure to let it dry well.
This is usually when I add "words" if I am going to, do it at the same time.


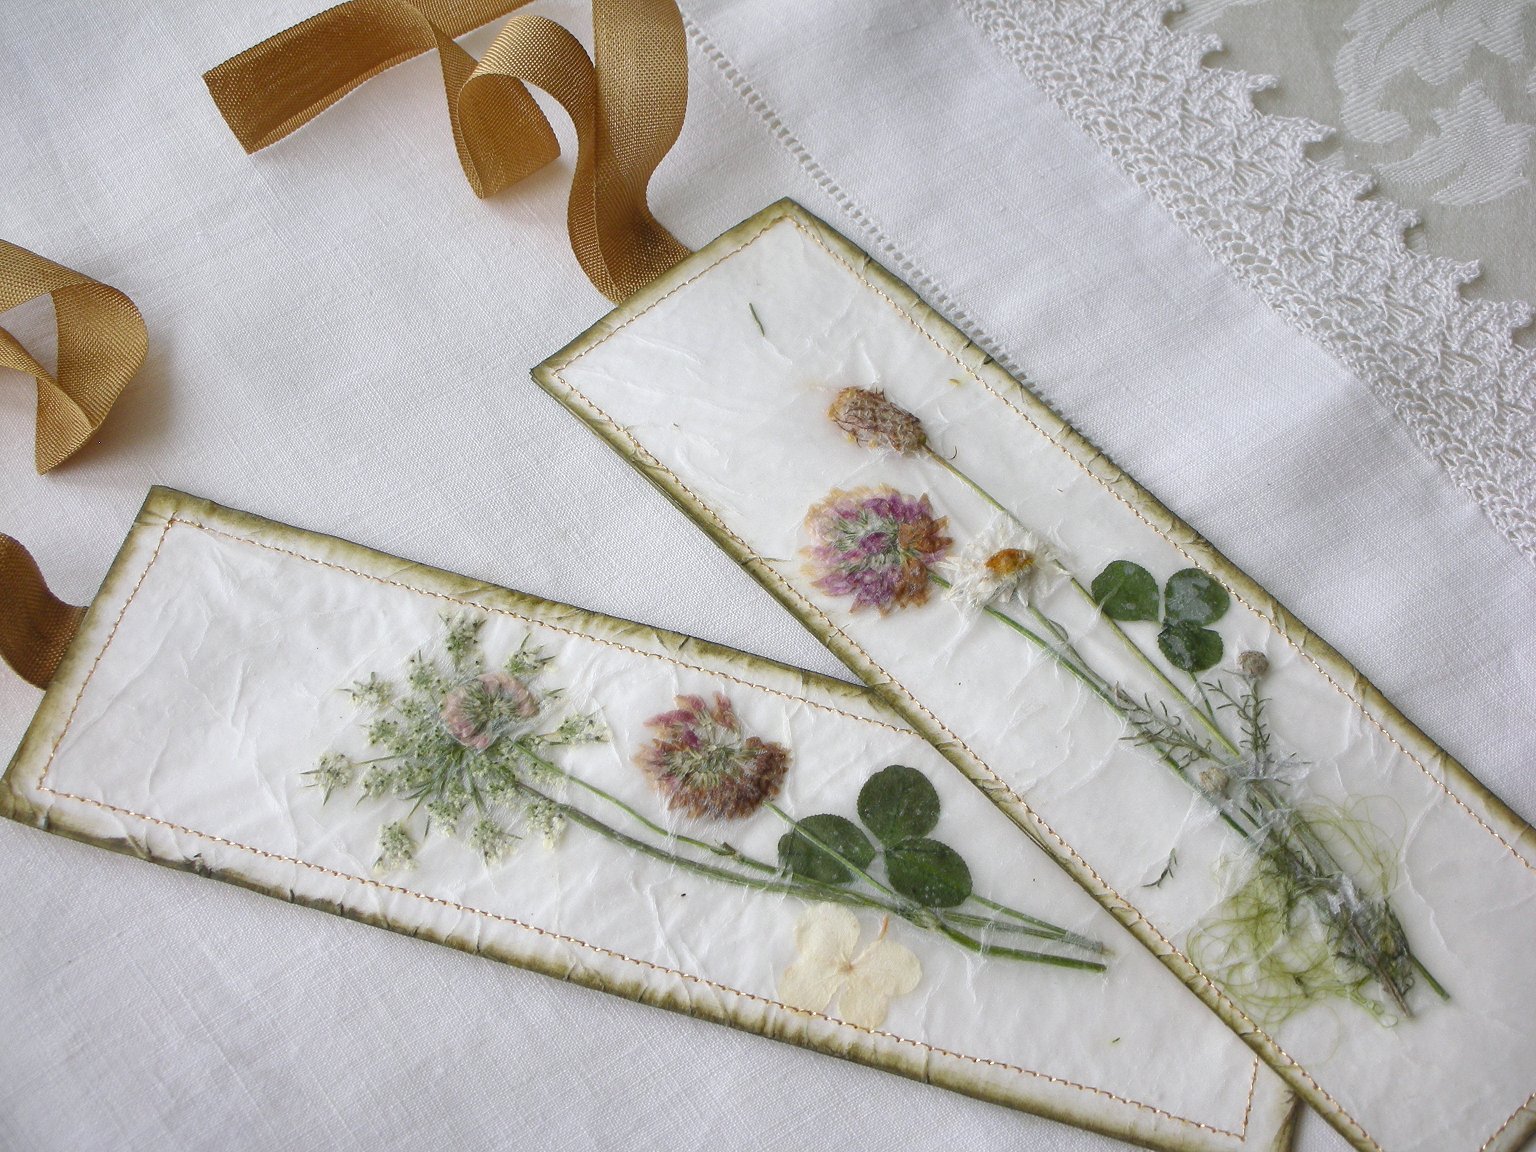
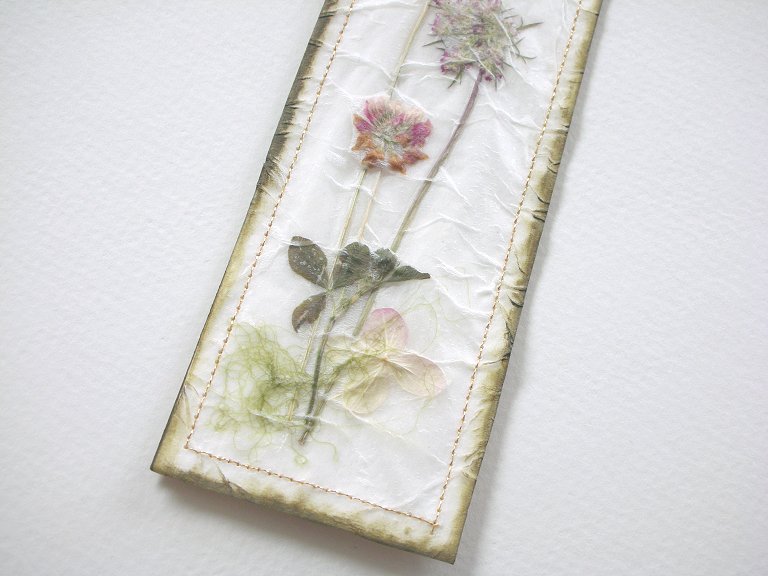
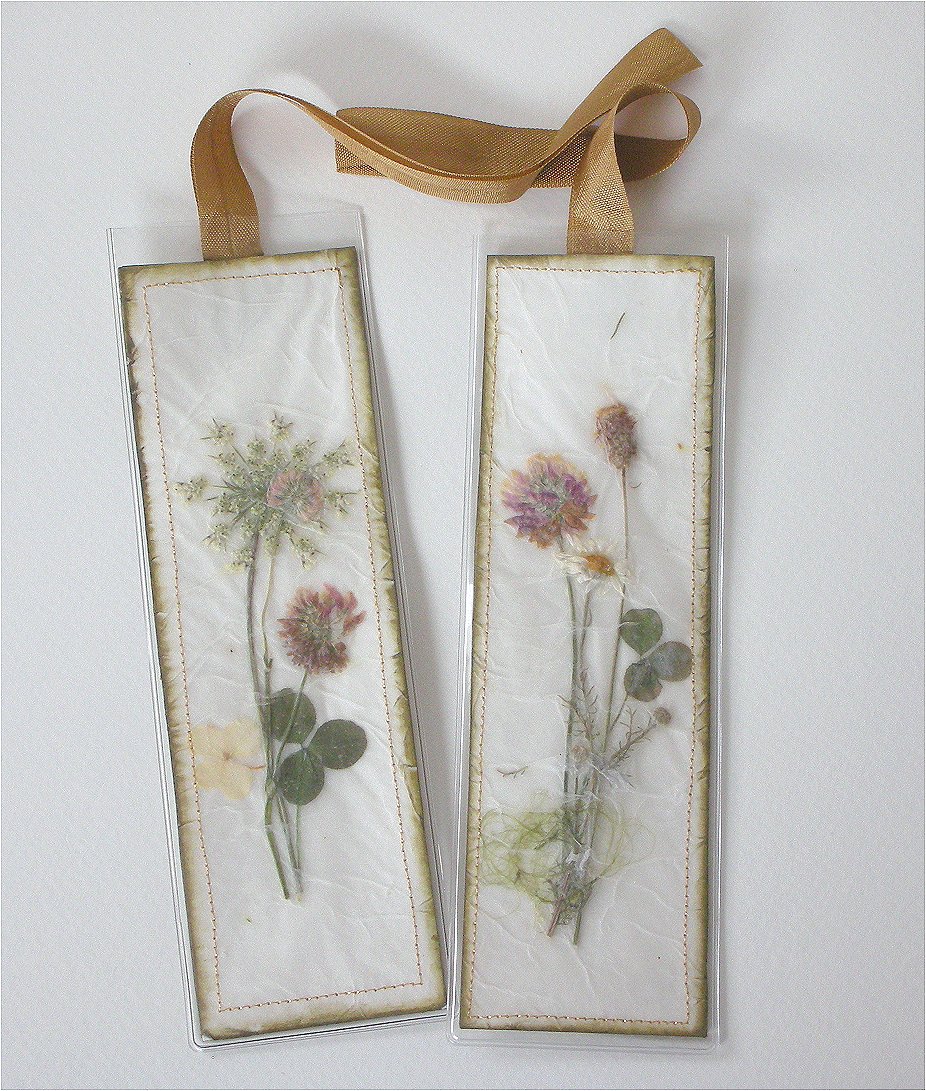
Now you have a pretty bookmark, which would make a lovely gift with a book or for a garden/nature lover, for anyone really, wouldn't you love one?

Here are two that I finished and put in plastic sleeves. I try to make them skinny enough to do this so it protects the bookmark, that way you can actually use it and not worry about it getting dirty, but sometimes the flowers I use are too wide for these plastic sleeves :)

I use a microwave flower press to dry my flowers and this is my wildflower series, but you can use whatever dries nicely for you, or has been in a flower press long enough to be dry.

Here are the links to my other posts featuring dried flower art....

Flower Art Continues

Flower Art and gifts from friends
Cut dried pressed and preserved
What are wildflowers anyway?
Microwave Flower Press

Hope you enjoyed my tutorial, and will show me what you have done with it :)
Lynn x


Print

Tuesday, August 10, 2010

Fig...ments of my imagination

Is it just me or is this the hottest summer we have ever had here in Ontario?
I am not sure about you but I would love some cool weather right now, I just can't enjoy this heat and humidity. Then again, look at the figs this year, and fresh from my mother in law's garden too. They seem to like it.

They are ohhhhhh so sweet inside and so good for you. Just wish they got rid of hot flashes......
My husband just pops them in his mouth, but I like to peel the skin back.
My father in law who passed away last December had a passion for his garden and this summer my mother in law who is 74 is insisting on keeping it up for him. She is a stubborn Italian woman that's for sure. I am not talking a small vegetable plot either, this is a huge garden , complete with a green house that Antonio built around the fig trees to keep them safe during our Canadian winters. He lovingly raised three fig trees from seedlings that a friend brought from Italy :)

I must take a photo of this garden, maybe I have one somewhere. Not only veggies, she has pear, apple, peach, apricot and plum trees. Not to mention grape vines, but the Racoon's have been around and they seem to like them. Did I forget the blackberries?

I keep this plate on our counter all the time and just keep adding to it, I love to see fresh foods in the kitchen. Not the cucumbers though, I am sick of eating cucumbers now LOL, way too many this year. The hot peppers are for my DH, but I have grown to love Eggplant since I have been married to him for so long. My MIL made the best Eggplant Parmigiana last week and sent over a huge plate, there was enough for two meals.

Lot's of fresh parsley, and herbs in her garden too, and tons of tomatoes. (We will be jarring them in September). I love the cherry tomatoes in a salad with radicchio and endive, tossed with olive oil, balsamic vinegar and a touch of salt. The sweetness of the tomatoes is beautiful with the more bitter taste of the salad. Try it :) We are having it tonight again.

It's almost dinner time, and DH is cooking pasta right now, that's probably why I thought of food, these photos are making me hungry. It's a good thing he knows how to cook , or I probably wouldn't be eating all this good food. (For those that don't know it, I am terrible in the kitchen, unless it's to clean up.)

Cooper loves to be in the kitchen, he has his dinner first, and dad boiled some chicken for him tonight. Spoiled dog he is.
Now he is happy to take a snooze in the sunshine while we have our dinner. Look how cute he is, snug as a bug. He is there right now beside me as always.

I received a lovely gift today from Patty, take a look. I have admired her cutlery for a long time now, her husband smashes them and forges the words into them for plant pots. I love seeing them in her garden, and so she kindly gifted me these, thank you sweetie :)
Seems quite fitting, food and cutlery, I wonder who used these and what type of foods they liked. They look to be some fancy silverware to me.

Each one was wrapped in tulle with one of Patty's hand crafted flowers, are they not sweet? Something else I keep wanting to try, making flowers.

Ok, I am being called for dinner, enjoy your's too , bon appetit :)